Table of Contents
Using Color Codes
Introduction
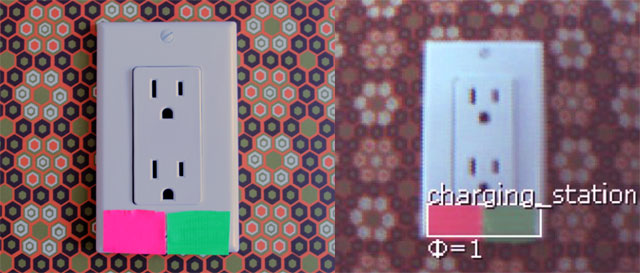
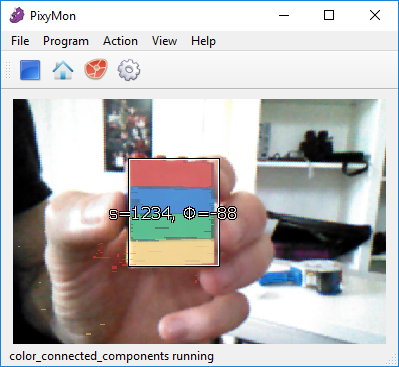
So, what’s a “color code”? A color code (CC) is two or more color tags placed close together. Pixy2 can detect and decode CCs and present them as detected objects.
For example, using 2-tag CCs (like the photo above) and limiting yourself to a palette of 4 colors (i.e. teaching Pixy2 4 different color signatures), you can generate up to 12 unique objects. 3, 4, and 5-tag CCs with more / different colors allow for many, many more unique objects. Pixy2 will detect and report color codes with up to 5 tags arranged in a line. With 5 tags, thousands of unique codes are possible.
Why Color Codes?
CCs are useful if you have lots of objects you want to detect and identify – more than could be detected with the seven separate color signatures alone. CCs also improve detection accuracy by decreasing false positive detections. That is, there is a lower probability that specific colors will occur both in a specific order and close together. The drawback is that you need to place a CC on each object you’re interested in detecting. Often the object you’re interested in (yellow ball, purple toy) has a unique color signature and CCs aren’t needed. Objects with CCs and objects without CCs can be used side-by-side with no problems, so you are free to use CCs for some objects and not others.
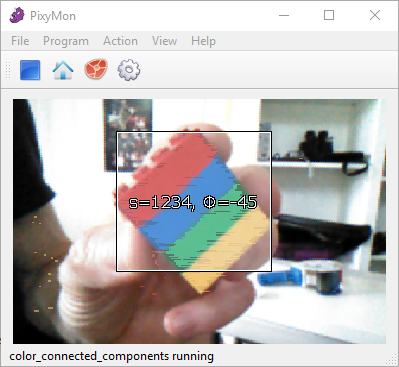
CCs also give you an accurate angle estimate of the object (in addition to the position and size). This is a “freebie” that some applications may find useful. The angle estimate, decoded CCs, regular objects and all of their positions and sizes are all provided at 60 frames per second.
CCs might be particularly useful for helping a robot navigate. For example, an indoor environment with CCs uniquely identifying each doorway and hallway would be both low-cost and robust.
Getting Pixy2 to track Color Codes
In order to get color codes working on Pixy2, you need to do the following:
- Run the color_connected_components program by selecting it in the Program menu
- Make sure that the Color code mode parameter in the Expert tab is not disabled. It should be enabled by default.
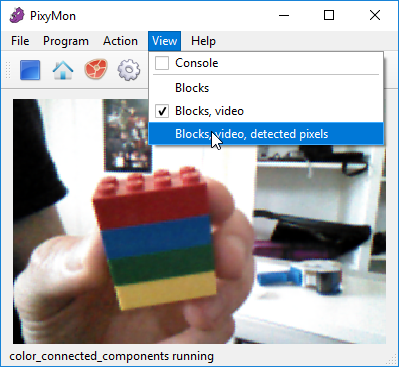
- Set the view to Blocks, video, detected pixels in the View menu. This will provide good feedback while you are teaching the color code signatures (see below).
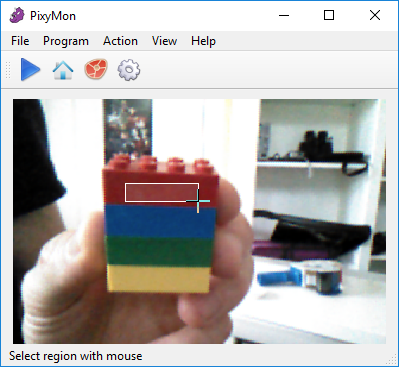
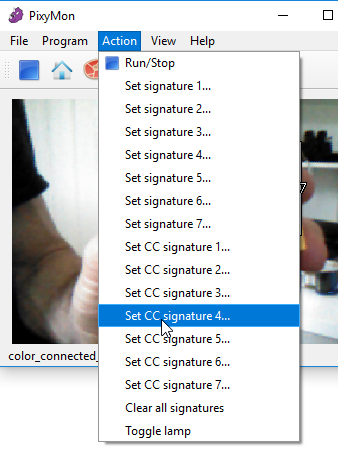
To teach Pixy2 the color code signatures, put a color code in front of Pixy2 and select Action➜Set CC signature 1 and select the first color in the color code. The photos below show the steps for a 4-tag color code:
Then outline the first tag on the color code:
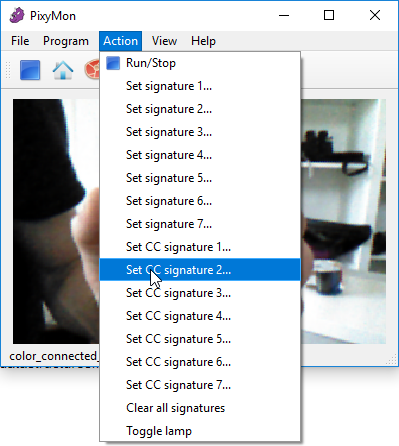
Pixy2 will then generate the first color code signature and store it. Next, select Action➜Set CC signature 2 for the second color in the color code and select the next tag.
Repeat this process until all the unique colors are taught to Pixy2 as color codes, so here we go for the 3rd and 4th colors:
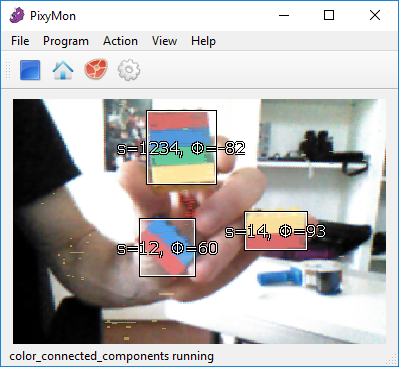
When all color code signatures have been taught, Pixy2 should be identifying color codes that are present, using the color code signatures that you just taught it. You'll see something similar (below):
Once you get all of the signatures programmed, you can mix them up and Pixy2 will “decode” each one.
What's this "color code signature" business? How are color code signatures different from normal signatures?
As you know, Pixy2 has seven color signatures that it can learn/remember. Each signature can either be a normal signature or a color code signature. All signatures that you teach Pixy2 are considered normal unless you choose a Set CC signature option from the Action menu. Color code signatures, as you can probably guess, are only used for color codes. In other words, these signatures need to form a color code (two or more color code signatures) for Pixy2 to recognize them as an object and report them. This is the default color code behavior, but the Color code mode can change this (see below).
What about the angle that's reported?
The angle value that's reported raises a question – since color codes can be in any orientation, aren't there two possible ways to report a color code? For example, a color code that has three tags consisting of: color code signature 1, next to color code signature 2, next to color code signature 3, could have an octal representation of 123, or possibly 321. Which representation is used? The smaller numerical representation (123) is always reported for consistency. In other words, 321 will never be reported because it's considered invalid.
Color code modes
Pixy2 supports four different color code modes through the Color code mode parameter.
- Disabled: No color codes are detected or reported. Objects that match color code signatures are reported as normal objects.
- Enabled: This is the default mode. Detected color code objects are reported, along with normal objects. However, objects that match color code signatures, but are not part of a color code (two or more color code signatures) are not reported.
- Color codes only: Objects that match color signatures (whether they are normal signatures or color code signatures) are reported only if they are part of color codes (two or more signatures).
- Mixed: In this mode, color code objects are reported along with normal objects. Additionally, objects that match color code signatures, but are not part of a color code are also reported.
Now, that may have been confusing… We expect most people will find that Enabled mode is the most useful, so if in doubt, just stick with that.
